Clutch Replacement
It's worth checking out the clutch wear to determine if you need to replace it. I found this guide on the internet: Clutch Wear Check. The check told me the clutch was about 60% worn, so I estimated it was changed at about 100K and had another 50K left.
However, the car did 100K around 1999, and I figured it would be an old rubber-centred clutch. The rubber would be 24 years old, so it was best to come out and replace it with a spring-centred clutch. This would also allow me to replace the clutch fork and bearing. Also, as all the rear suspension had been removed, the job was 50% easier.
Before starting the job, it is worth watching a few YouTube videos. I rattled through the following to gain the much-needed knowledge and to figure out what parts I shoud replace regardless of them being worn.
Removing the gearbox and dropping the torque tube was easy. However, removing the bell housing connected to the engine was difficult. The car must be high enough to get a slide hammer in to get the clutch fork shaft out. I had to get a really short slide hammer to help with this. The bell housing blots are at funny angles. No combination of socket extensions or universal angle joints could get these out. What worked for me was a really long 19mm ring spanner, I tried putting some pipe over a smaller one, but it just slipped off when I tried to loosen off the bolt.
With all the parts off, I managed to get to the clutch and flywheel. The clutch had been changed in 1998 and was about 50% worn.
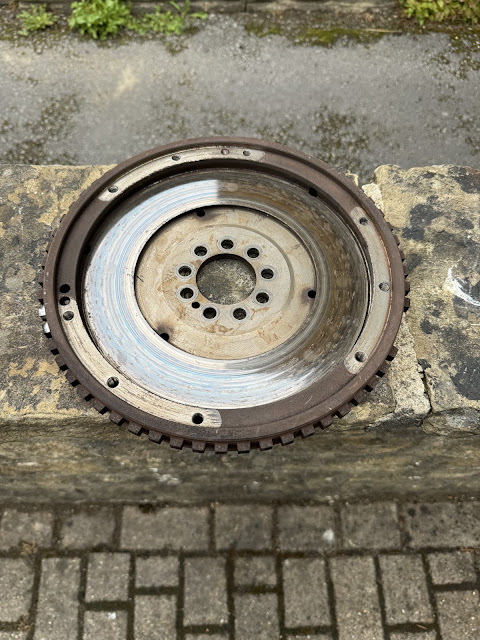
The flywheel had some glazing and a noticeable high spot around the centre of the clutch matting surface.
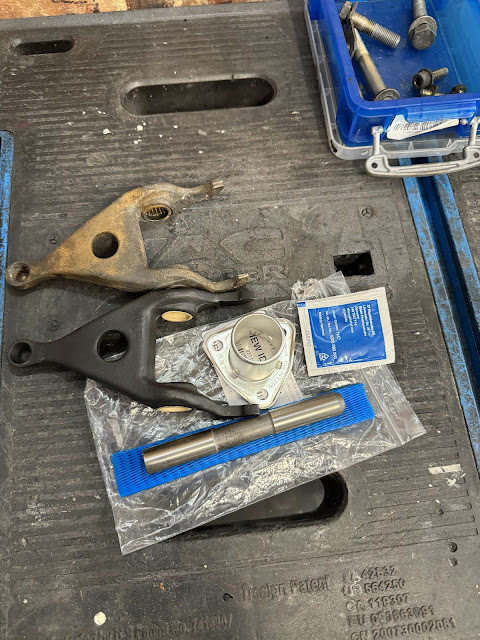
I resurfaced the flywheel and purchased a reconditioned clutch fork from 60 Degree Motorsport. Their forks were cleaned and Cerakoted, fingers were welded back up, and bearings were replaced with IGUS composite bushings for long, trouble-free service life.
All the guides advise changing the clutch bearing, guide tube, clutch fork pin, and crank seal while you're down there, which I did because it was cheap and a pain to get to if they fail later.
I ended up slotting the bell housing as on the 944 S2, there is only one sensor, so the hole was tiny.
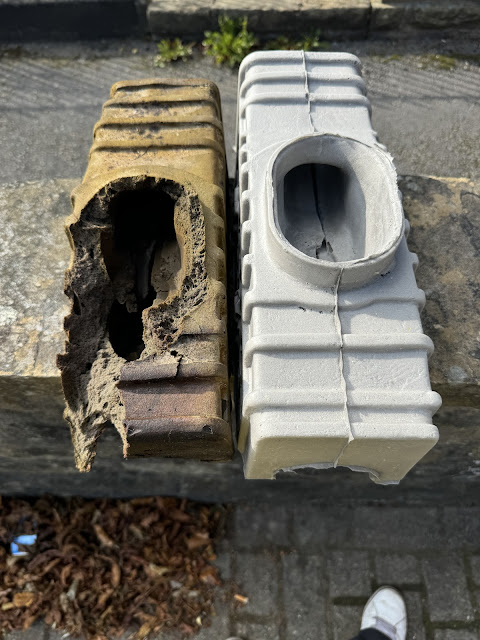
I set the gap for the flywheel sensor to 0.8mm, bolted the bell housing in place, and pushed in the fork pin. Once that was done, I refitted the torque tube, exhaust hangers, and the two support braces under the torque tube. I replaced the foam inserts, which are still available directly from Porsche at around £115. Also, mine looked like some mice had been at it.
Bolting up the bell housing and torque tube was reasonably straightforward. I got the metal parts under the torque tube powder-coated and the gearbox cross-members at CAS coating. Using this post as a guide, I also fitted an upgraded gearbox mount filled with urethane.
The urethane mod came out well and is removable, so if the mount creates too much vibration, I can swap it out.
I also replaced the front mild steel gear lever in the cabin with an uprated stainless steel one from JGM Porsche.
Getting everything back in place was easy, with the only tricky bit being lining up the holes for the torque tube coupling. If, like me, you moved the torque tube bar while separating it from the clutch housing, the two parts will not line up. To resolve this, you can attach the coupling to the torque tube, tighten it, and use a crowbar to push the bar further into or out the clutch hosing until you can align it with the slot on the gearbox input shaft. You can use a little hole in the torque tube as a leverage point.


