Engine Front Seals & Belts

There are many seals on the front of the 944, and it seemed like most of them were leaking. Design911 sells a kit for all the seals; however, the crankshaft-toothed seal will also need changing as it wears and pushes oil out onto the belts. 

 The parts you need to replace all the leaking parts are below: 

Left Balance Shaft

  • 999 113 282 40 Shaft sealing ring
  • 928 105 139 02 Spacer sleeve
  • 944 105 321 00 Gasket/small O-ring
  • 999 701 652 40 Large O-ring

Right Balance Shaft

  • 999 113 281 40 Shaft sealing ring
  • 928 105 139 02 Spacer sleeve - bought
  • 944 105 321 00 Gasket/ small O-ring
  • 999 701 652 40 Large O-ring

Crank Seal

  • 999 707 283 40 Round seal
  • 944 107 161 04 Toothed sleeve
  • 999 113 331 40 Shaft sealing ring

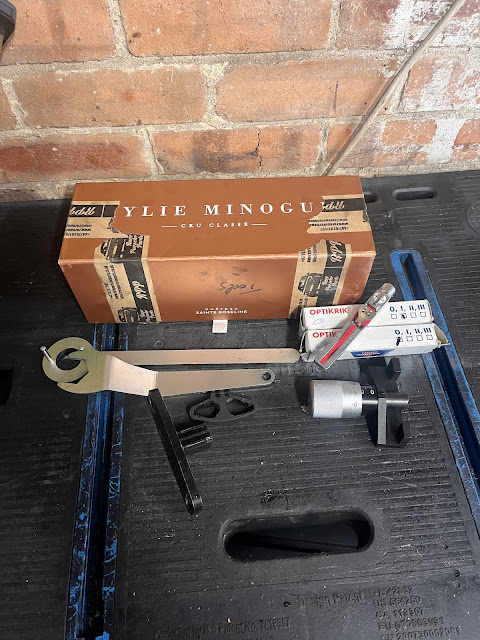
Removing the required parts is a "long thing, " so it is worth watching a few videos to learn how to remove everything from the car. Before you start, you will need a flywheel locking tool to lock the engine TDC. You will also need a special belt tensioner spanner and another tool to remove the balance shaft pulleys. I also got a camshaft locking tool, which did not fit and was not worth the effort to get it to fit in the end, as the camshaft pulley does not really move, so it does not need locking in place. To measure the belt tension, you will need some Optibelt - OptiKrik tools, 0 & 1 are needed.

I got the job lot from eBay, from Rare Porsche Parts (RRP) who probably got them from some other idiot who did the work and decided to sell the car to guarantee he would never have to do it again, as it is a proper crap job 😡


The belt setup is overly complicated. The diagram below is the best one I could find. On the 1989 944 S2, there is an extra timing belt idler pulley under the timing belt tensioner spring, which is torqued to 45Nm.  


The alignment marks are below: 
 

I could not find the OT mark using the top gearbox inspection hole. However, there is a timing mark at the bottom of the gearbox bell housing on the exhaust manifold side, which is below. 

Below are all the seals and sleeves. In my case, the worn sleeves and the o-rings for the balance shaft casings are causing the oil leaks. You can see the scoring on the crank sleeve with the oil pump gears on below: 


Cleaned up the balance shaft casing, the steering rack pump, and the alternator mounting, as these were all covered in oil and dirt, 


To access the seals and sleeves, the timing belt, balance shaft belt, alternator belt, steering rack pump belt, and plastic covers must be removed. Removing the airflow meter also helps with access, so that came off, too, and the oil was cleaned off using some degreaser and a pressure washer.


To complete the seal replacements, I also did the sump gasket, which means bracing the engine up top, removing the steering rack, disconnecting the suspension, removing the bottom engine subframe and disconnecting the engine mounts. As I did this when I replaced the engine mounts, I knew the drill, see -  Engine Mount Replacement.

The sump was also covered in oil, and after many clean-ups with a degreaser, it came back up better but not amazing 😩


There are so many articles about the tension of the belts. There is a super expensive Porsche tensioning tool for $1.5K, and then there is the ArnnWrox tool AWX-920v6 at $200, but both are impossible to find. I used the Optibelt tools, which need a few Porsche 944 data references to use. The tool itself is a bit tricky to use - Optibelt Instructions. I also used the twist method as a secondary check.

This is the procedure I used 

Timing Belt
Once the belts are on.....
Turn the engine clockwise for two complete turns using the crankshaft pulley bolt and verify that the crankshaft, camshaft, and balance shaft pulleys are at TDC.
Turn the crankshaft 10° counter-clockwise. This is approximately 1.5 teeth on the camshaft sprocket.


Adjusting the tension on cars with spring tensioners:
  1. On the front plate of the spring tensioner, there are three fasteners. One holds the roller in the tensioner. The other two are used to tension the belt. To tension the belt, simply loosen the lock nut on the pivot arm (top fastener) and the locking bolt (lower). 
  2. Using a pry bar or balance shaft pin spanner, you may want to gently nudge the tensioner in the release direction (i.e., more tension on the belt). Sometimes, the spring tensioners like to stick after sitting for a while. Once you're satisfied that the tensioner has been released, tighten the 
  3. tensioner lock nut/bolt.
  4. It is worth noting that the idler for the timing belt and the metal guild rail need to be removed to measure the belts' tension. 
Timing Belt Tension
  • New belt - 4.0 ±0.3
  • Used belt - 2.7 ±0.3
  • Optibelt Tool - 40 lbs 
Balance Shaft Belt Tensioning

The idler balance shaft belt idler pulley must be removed to measure the belts' tension.
  • Old style belt (15 mm wide) - 2.7 ± 0.5
  • New style belt (18 mm wide) - 3.5 ± 0.5
  • Optibelt Tool - 28 lbs (20 lbs is the reading to aim for here; see comparison with Porsche Tool below)
Adjust the balance belt idler roller such that the clearance between the roller and the belt at the lower balance shaft sprocket is 0.5 mm. I used a 0.5 mm feeler gauge. When properly adjusted, torque the locknut to 45 Nm (33 ft-lbs).

Auxiliary Belts

Alternator belt tension to 85 lbs (110 lbs using OptiBelt)
Power Steering Belt - 5mm deflection (70 lbs using OptiBelt)
 
Comparison with Porsche tool

 Check out the post -  P9201 Tool vs Optibelt tool. The values mapped to these below:
  • Optibelt Tool - 40 lbs- Timing Belt
  • Optibelt Tool - 28 lbs - Balance shaft belt 
  • Optibelt: 110 lbs - Alternator belt, across the TOP span of the belt (between crank and alternator)
  • Optibelt: 70 lbs -  Power steering belt - across the bottom span
Manual belt check
Timing belt- 90 degrees twist with thumb and forefinger
Balance belt- 180 degrees twist with thumb and forefinger
Water Pump Method: I could just about turn the water pump pulley with the belt tensioned without the belt moving. You need a good grip. I used some mole grips to get it moving, and then after that, I could just slightly turn it with my hand.


Dropped the oil and added a new oil filter and some of the new Porsche Classic Motoroil especially made for the Porsche four cylinder water cooled engines found in the transaxle models Porsche Classic Motoroil